I’ll be honest with you. When I first started measuring EMF around my house, I had no idea what was actually happening inside the meter. I was just pointing it at things and watching the numbers change. It worked, but I felt like I was missing something.
So I went down a research rabbit hole, the way I tend to do with anything that catches my curiosity. And once I understood the basic mechanics, the whole thing clicked. The readings made more sense. I got better at interpreting what I was seeing. And I made smarter decisions about which meter to reach for and when.
This is the explanation I wish I’d had at the start. If you’re trying to decide which meter to buy, there is my list of the best EMF meters.
The Basic Idea
EMF meters are essentially antennas with a small processor attached.
Think about how an old TV antenna worked. It picked up signals traveling through the air and converted them into something useful. An EMF meter works on a similar principle, except instead of turning signals into a picture, it measures how strong those electromagnetic fields are and displays that strength as a number.
Every meter has a sensor that detects electromagnetic fields. When a field passes through or near that sensor, it creates a small electrical current. The meter measures that current, runs it through a conversion formula, and gives you a reading in units you can actually work with. The details of how that happens depend on what type of meter you’re using.
What’s Inside the Meter
Most EMF meters share the same basic components.
The sensor is the part that actually detects the fields. Some meters have one sensor, others have three. More on that in a moment. The sensor is typically a coil of wire for magnetic fields or a small antenna for radio frequencies.
The processor takes the raw signal from the sensor and converts it into a meaningful reading. This is where the math happens, turning raw electrical current into milligauss, volts per meter, or microwatts per square meter depending on what you’re measuring.
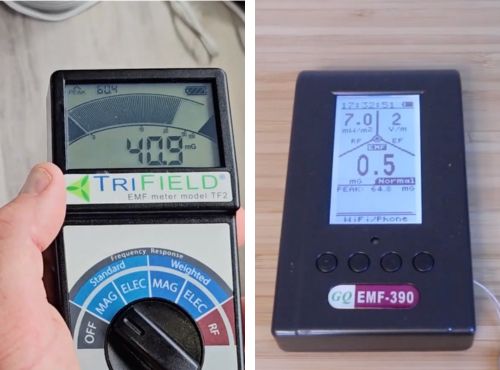
The display shows you the result. Some meters use simple LED indicators. Others have digital screens with bar graphs and numerical readouts. My Trifield TF2 has a screen that shows the current reading alongside a fast-moving bar graph, which I find useful for scanning a room quickly.

How Different Fields Get Detected
The detection method varies depending on what type of EMF the meter is built to measure.
For low-frequency magnetic and electric fields, like those from household wiring and appliances, meters use induction coils. These are loops of wire that generate a small electrical current when a magnetic field passes through them. The stronger the field, the stronger the current, and the higher the reading on your display.
You can see this in action by moving a meter slowly toward and away from a running appliance. The numbers track the field strength in real time. I’ve done this with my microwave, my refrigerator, and the wiring panel in my hallway. The way the readings drop off with distance is consistent and predictable every time.
For radio frequency detection, meters use antennas tuned to specific frequency ranges. The antenna picks up the RF signal, the processor measures its strength, and the result appears on screen in whatever unit the meter uses for RF. This is why some meters can detect Wi-Fi but not certain 5G bands. They’re tuned to different parts of the spectrum, the same way an AM radio won’t pick up FM stations.
Single-Axis vs. Tri-Axis
This is one of the more practical things to understand about how meters work, because it affects how you use them.
A single-axis meter has one sensor oriented in one direction. It only detects fields coming from that specific direction. If the source is off to the side or behind the sensor, the reading will be lower than the actual field strength. This is why single-axis meters require you to rotate the device slowly until you find the orientation that gives you the highest reading.
A tri-axis meter has three sensors arranged at right angles to each other, covering all three dimensions simultaneously. The processor combines those three readings into a single total field strength value. No rotating required. You get an accurate reading regardless of how you hold the meter or where the source is relative to you.
The price difference between single-axis and tri-axis models is usually in the $50 to $100 range. For regular home testing, tri-axis is worth it. Both meters I own are tri-axis.
Frequency Range and Why It Matters
Every meter has a frequency range it’s designed to detect. Some RF meters top out at 3 GHz. Others go to 8 or 10 GHz.
If a device is transmitting at a frequency outside your meter’s range, you won’t get a reading. Not because the field isn’t there, but because the meter isn’t designed to detect it. It’s the same principle as trying to hear a frequency outside the range of human hearing. The sound exists, but the receiver can’t pick it up.
This is why checking the specs before buying matters. For most home testing, a range up to 8 GHz covers the majority of what you’ll encounter. If you’re specifically concerned about higher-frequency 5G bands, you’d need something that goes further. If you’re still working out which specs matter for your situation, this guide on choosing the best EMF meter walks through exactly what to look for.
What the Numbers Actually Represent
The meter detects a field, measures the resulting current, and converts that into standardized units. For magnetic fields, that’s milligauss (mG) or microtesla (µT). For RF, it’s typically microwatts per square meter (µW/m²) or volts per meter (V/m).
The conversion formulas are built into the meter’s processor. What you see on screen is the result of that calculation applied to whatever the sensor is detecting in real time.
Some meters also calculate averages over time or capture peak readings separately from average readings. My GQ EMF-390 does both, which is useful when readings are fluctuating and I want to understand the range rather than just a single snapshot.
Accuracy and What It Means for Home Testing
Consumer-grade meters typically carry a margin of error somewhere between 3 and 10 percent. A reading of 5 mG might reflect an actual field strength anywhere from about 4.5 to 5.5 mG.
For home testing, this level of accuracy is fine. You’re looking for patterns, relative differences between locations, and whether a source is significantly elevated compared to background. You’re not conducting laboratory measurements that require precision to two decimal places. For that kind of work, NIOSH publishes EMF measurement protocols used in occupational health research and hazard evaluations.
What this does mean is that small fluctuations in readings are not necessarily significant. If your meter bounces between 2.5 and 2.8 mG in the same spot over a few seconds, that’s normal variation within the measurement range, not a real change in the underlying field.
The Display and How Meters Communicate Readings
Meters handle readout differently depending on the design.
Some use LED indicator lights in green, yellow, and red to give a fast visual sense of level without showing exact numbers. Simple and quick, but limited.
Most mid-range and higher-end meters use a digital display with numerical readings. I prefer this because I want to know the actual value, not just a general category. Many of these also include a bar graph that updates in real time, which is genuinely useful when you’re scanning a room and want to see changes as you move.
Audio feedback is something I didn’t expect to find useful until I started actually using it. A meter that produces faster beeps as readings increase lets you walk through a space without constantly watching the screen. You hear the change before you look down, which makes scanning rooms more intuitive.
What Meters Can and Can’t Tell You
Understanding the limits of your meter is as important as understanding how it works.
A meter can tell you that a field is present and how strong it is at that moment in that location. It can’t identify the source automatically. If you get a high reading in the middle of a room, you still need to investigate to find what’s causing it.
Readings also vary with time. RF sources pulse rather than transmit continuously, which means readings can spike and drop within seconds. Magnetic fields from appliances only appear when those appliances are running. Taking a single measurement at one moment in time doesn’t always give you the full picture.
And meters can pick up interference from things you’re not trying to measure. A wireless key fob in your pocket, a phone buzzing on the table nearby, or a large metal object between you and the source can all affect a reading. You learn to recognize these situations with experience.
Why Understanding This Makes You a Better Tester
You don’t need to know any of this to turn a meter on and read the display.
But understanding what the meter is actually doing changes how you use it. You’re less likely to misinterpret a fluctuating reading. You’re better equipped to choose a meter that fits what you’re actually trying to measure. And when a reading surprises you, you have a framework for figuring out whether it’s a real finding or something to investigate further.
I’m not a doctor or an engineer, and nothing on this site is medical advice. EMF research is still evolving, and I aim to share what the current evidence suggests rather than draw conclusions the science hasn’t reached yet.